
Hello World
The plan was simple:
- Install Raspberry Pi OS Lite
- SSH into the Pi
- Create a hello_world.py file and execute it
- Have a beer and start planning next steps
1. Installing Raspberry Pi OS Lite
I don't have much to add here. The documentation is fantastic, and the installer works great! It's difficult to go wrong. Official Getting Started Documentation.
2. SSH Into the Pi
I think it started to go wrong in step 1. At some point I stopped reading and started skimming. Also, I want the Pi to be 100% headless — I view the Pi as the brains of a physical product, not a computer to play with — the documentation mentioned an HDMI cable, a keyboard, and some fancy looking desktop running on the Pi. Anyway. In my wisdom, I left the documentation behind and started Googling.
The details aren't interesting, but I will share a few gotchas I learned along the way:
- You can SSH into the Pi even if you can't ping it.
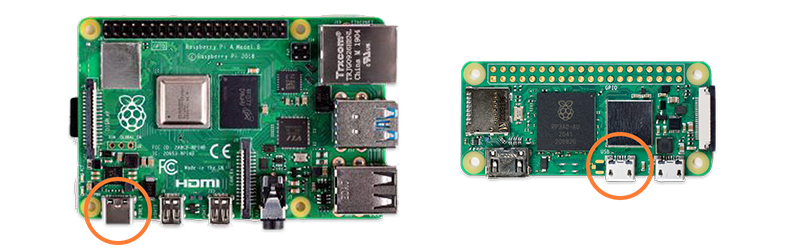
- If you want to connect to the Pi via USB:
- You need to enable Gadget Mode (which enables your USB0 port to act as a network port).
- There is a specific port for Gadget Mode, and it's not the Power Port.
- It's a bad idea to both power the Pi and run data to your Pi from the same computer using two USB cables.
- The ratings on USB cables matter:
- Power Cables and Data Cables aren't the same thing.
- Using a converter dongle, like adapting USB-C to Micro USB, may turn a Data Cable into a Power Cable.
- Order of operations matters; it won't auto connect without at least some configuration I haven't yet discovered unless:
- Power off Pi
- Insert Data Cable
- Power on Pi
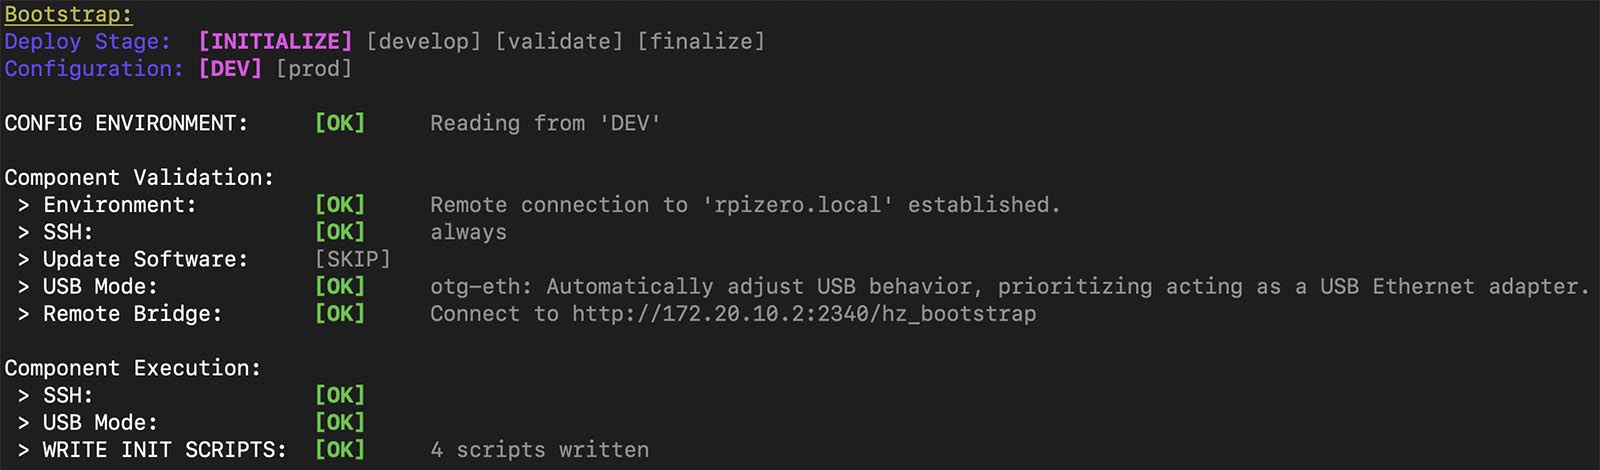
Once I finally got the Pi working, I reflashed it to ensure I understood the process. I would like to say that it was faster the second time. At this point, I realized manual setup wasn’t for me. I did the only logical thing and wrote some code to handle it consistently and reliably: Bootstrap.
3. Create hello_world.py
Some time later, I'm finally ready for Hello World! It's time to SSH into the device and create the file.
Unless you changed the config, the default username is pi, and the default password is raspberry. The default device name is raspberrypi. This means you can access it via SSH on the command line with:
ssh pi@raspberrypi.local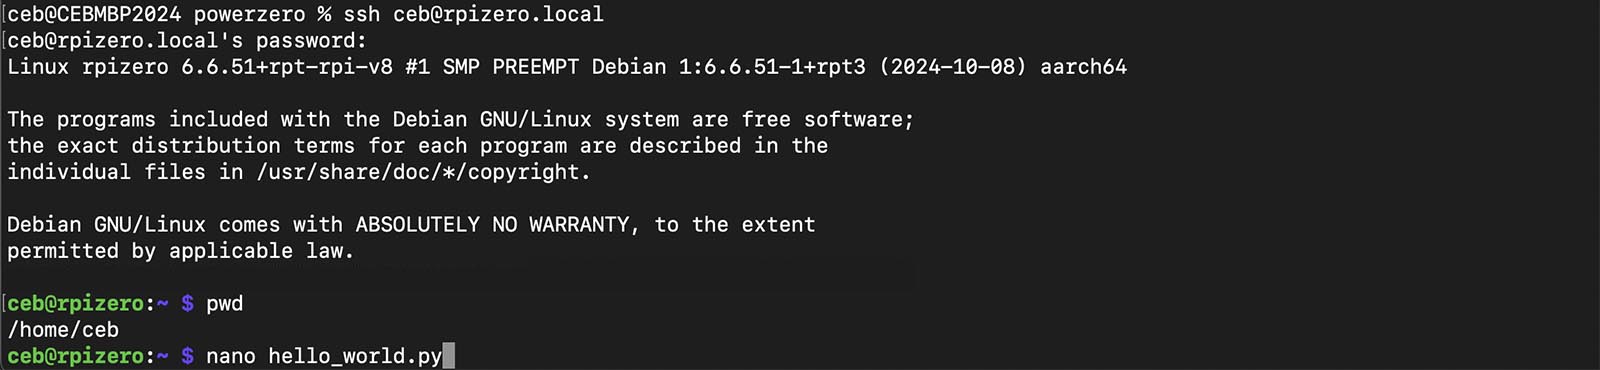 And you can create the text in your home folder with:
nano hello_world.py
 Press Ctrl-O to save the file, then Ctrl-X to exit nano. And now we can run the test!

Next Steps
Now that this is working, I need to setup my dev environment so that I can code on my Mac instead of using Nano. The parts I ordered should arrive in the next few days and I want to be ready!
Next Up: Remote Coding