Remote Coding
Now that we've successfully accessed the Pi and written Hello World, it's time to think about how to actually use this thing.
To me, the Raspberry Pi is a magical piece of hardware — a credit card sized computer. But I don't want to treat it like a desktop. What I want is to think of it as an advanced microcontroller — something with all the benefits of a full OS, but without ever having to connect it to a display or a keyboard.
This is exactly why I wrote Bootstrap. My approach isn’t just about remote coding — it’s about fully automating setup, deployment, and development. I want to be able to fresh-flash an OS, automagically install and configure everything I need at the push of a button, and have my code automatically and reliably execute.
The next steps are clear:
- Configure the Pi with Bootstrap; and,
- Write code on our Mac and test on the Pi.
Project Structure
A clean project structure keeps the learning projects organized and separate from the final implementation, while reusing the same toolchain. The basic folder structure is below:
  powerzero/
  ├── config/
  │   └── bootstrap_initialize.ini
  ├── learning/
  │   └── remote_coding/
  │       └── hello_world.py
  ├── requirements/
  │   └── common.txt
  │   └── dev.txt
  │   └── prod.txt
  └── tools/
      └── venv.sh
      └── bootstrap.py
      └── sync.py
  # Bootstrap config file, use this
  # to configure device name or account, etc.

  # All the code files associated with learning
  # How this stuff works will be here

  # These requirements are for the code
  # On your MAC/PC, NOT THE PI

  # All tools must be run from the powerzero folder
  # 1: Setup / Start the VENV
  # 2: Install / configure the Pi
  # 3: Code!
After refining this process, I can now go from powering on my computer to running code on a freshly installed Pi in under five minutes. The rest of the page will describe these steps:
- Setup Code Environment
- Fresh install Pi
- After a few minutes to achieve 25% progress, my old SanDisk fell out my computer and into the garbage. I bought a SanDisk Extreme Pro and it takes about 30 seconds for a fresh install.
- Configure the Pi with
tools/bootstrap.py - Keep the Pi in sync with your code with
tools/sync.py - SSH into the Pi to test the code
1. Setup Code Environment on Mac (or PC):
If you're new to Python, you may not have heard about virtual environments (Python Docs:venv). Virtual environments are essential for managing dependencies and isolating project-specific libraries, ensuring compatibility and avoiding conflicts.
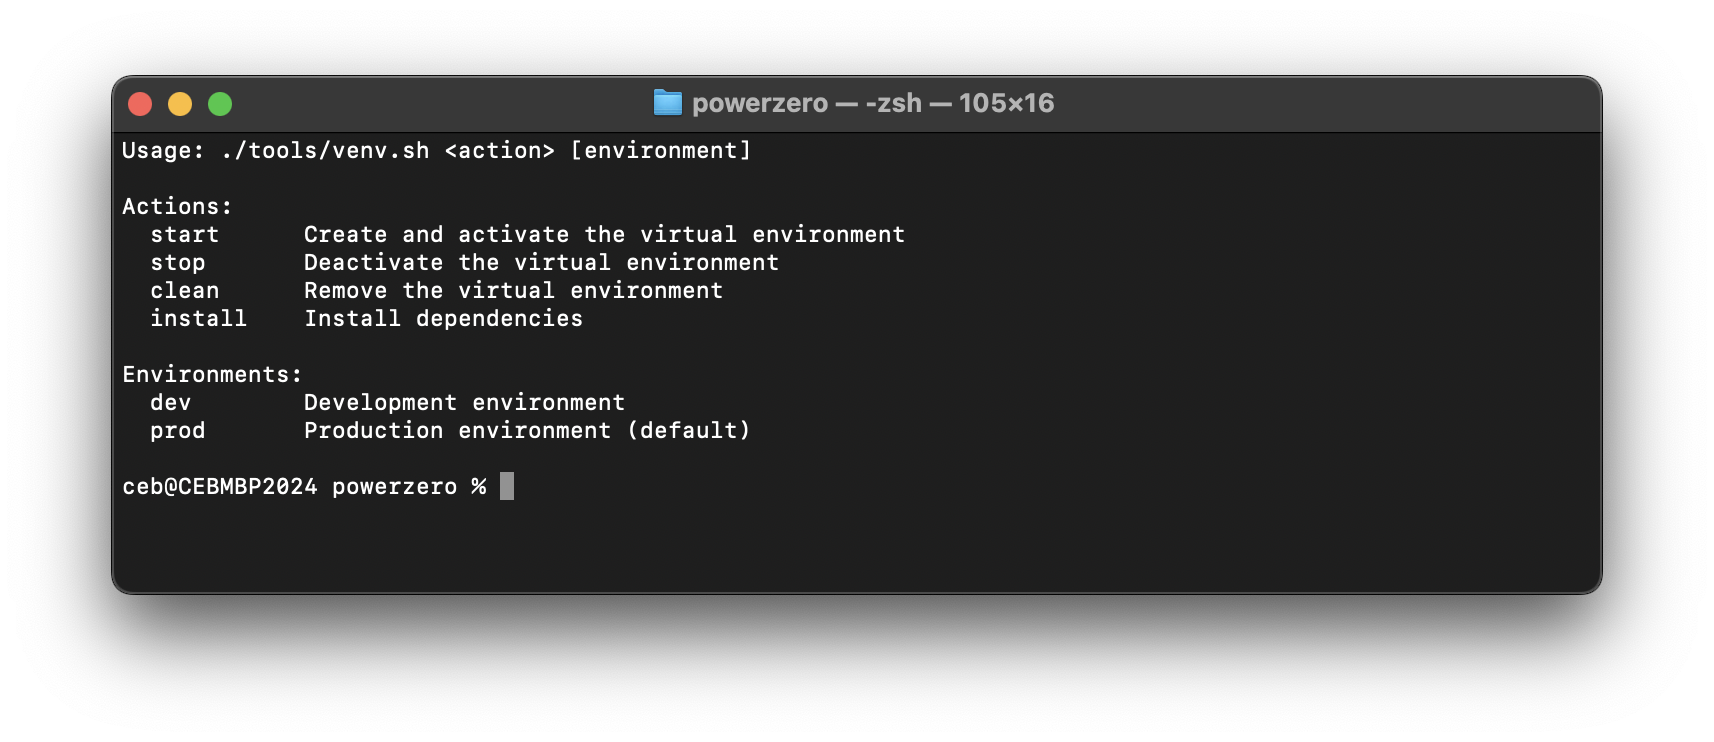
The venv.sh script in the tools folder simplifies creating and managing your virtual environment, so you don’t have to memorize complex commands. It automates the setup process, ensuring consistency. Note: all the tools are intended to be executed from the root /powerzero folder.
To setup and get ready to code, load a terminal and go to the /powerzero folder.
$ cd /your/path/powerzero
$ ./tools/venv.sh install
$ ./tools/venv.sh start
2. Fresh Install Pi:
If you already have a Pi installed you can use that, but if starting from scratch, here is the Official Getting Started Documentation.
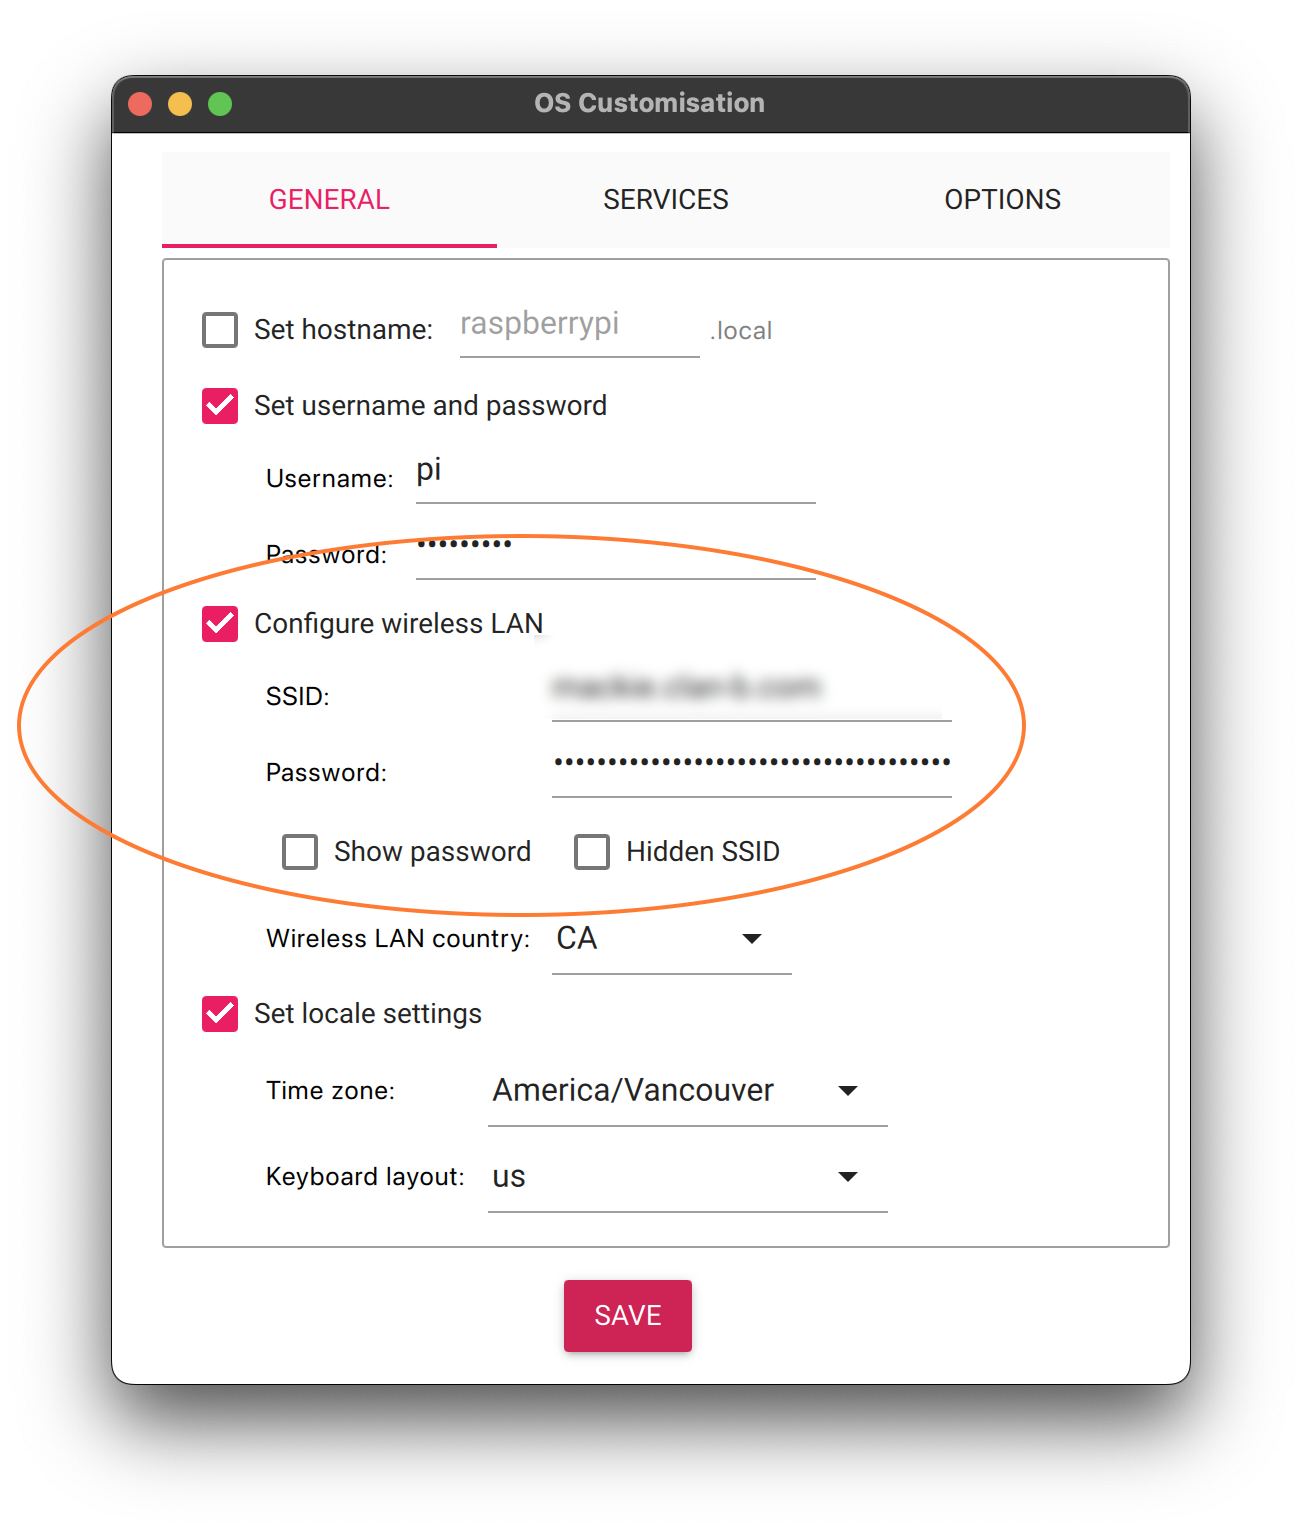
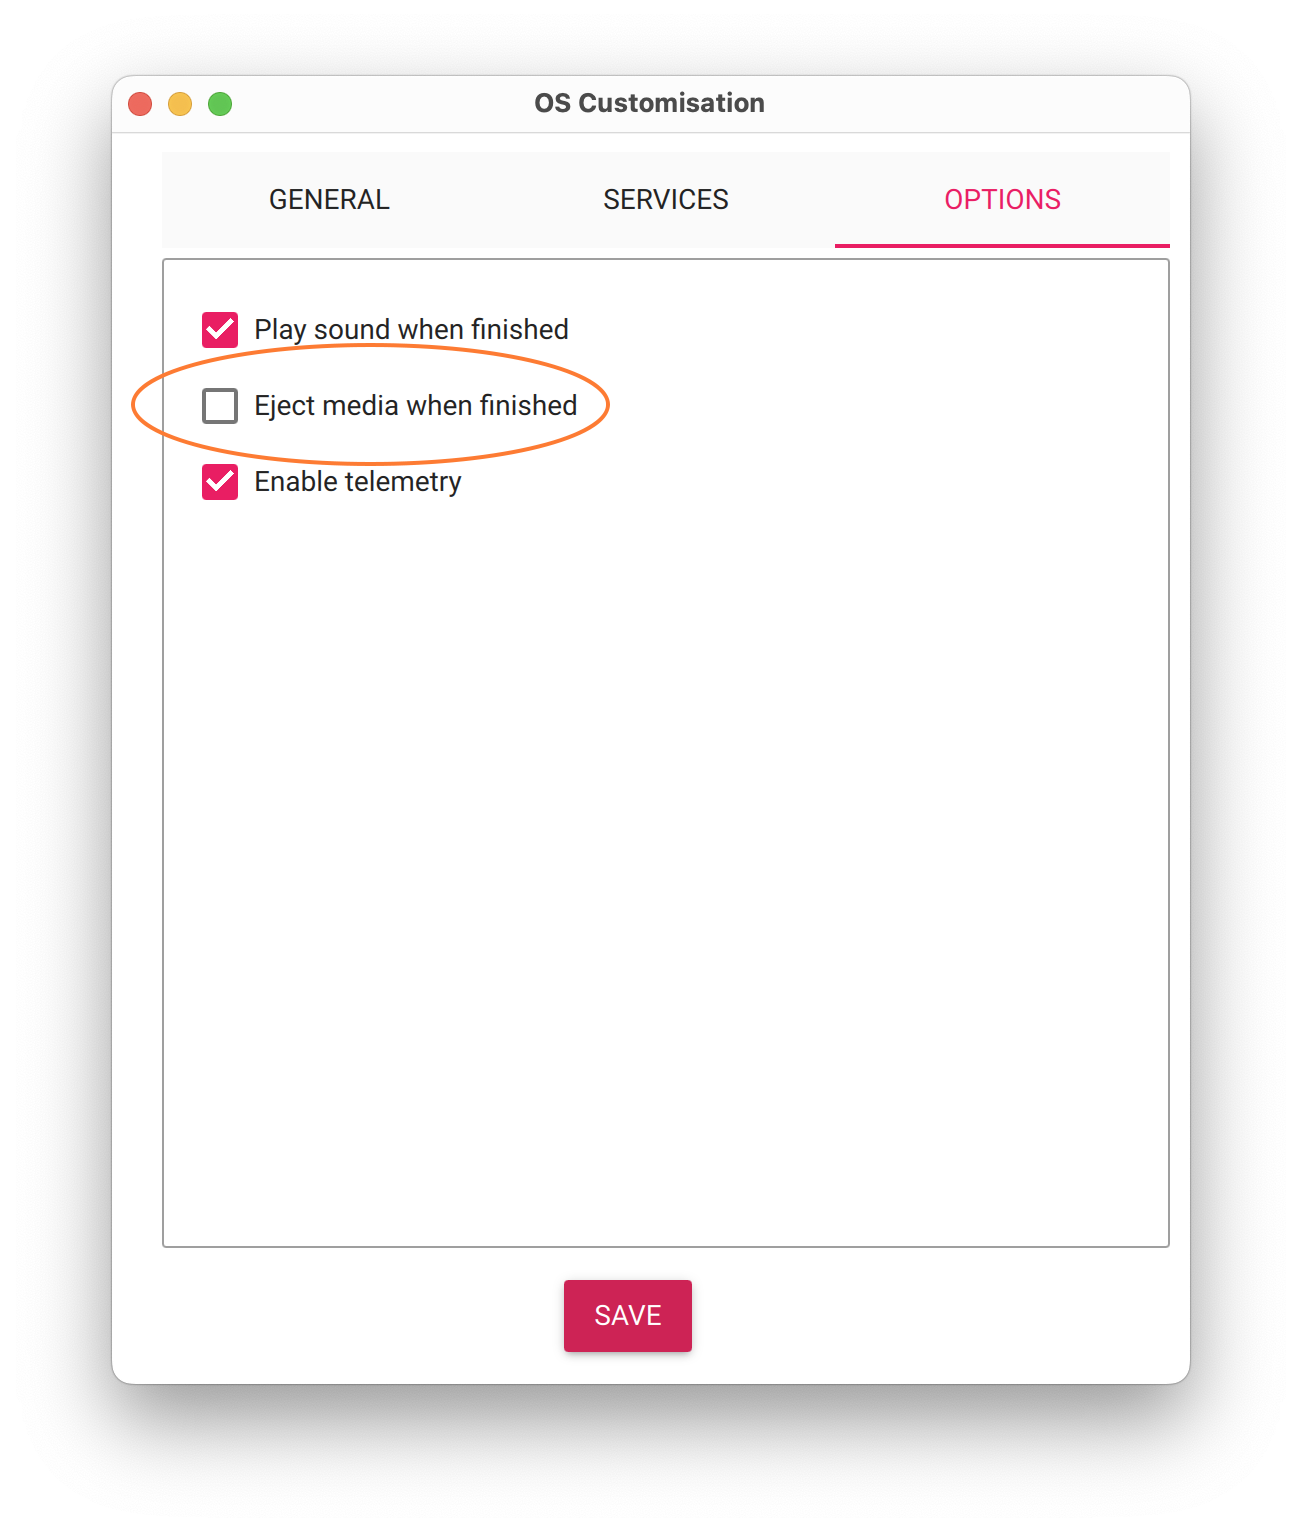
When configuring the Pi Installer make sure you configure the Wifi. This ensures the Pi can connect to your network on the first boot, allowing Bootstrap to finish the installation and configuration process. A few screenshots below. For the first install, do not eject the disk. The setup process writes critical files to the Pi’s disk while it’s still mounted on your computer.
WiFi configuration is required for the first install.
Uncheck the "Eject media when finished" option as Bootstrap will start on the attached Micro SSD and then when ready direct you to transfer the Micro SD to the Pi. If you accidentally eject it, you can just plug it back in again.
3. Configure the Pi with tools/bootstrap
In the same terminal where you set up and started the venv (step 1), run Bootstrap. This tool automates the setup and configuration process, installing everything your Pi needs. Bootstrap will discover the Pi disk and install on it. At the right time it'll eject the Micro SD. Put the Micro SD into the Pi, plug it in, and turn it on. Bootstrap will connect to the device when it's ready and continue configuration.
The first boot after a fresh install takes about three minutes before visible progress resumes. Subsequent boots and installations are much faster, typically completing in 30-40 seconds.
Bootstrap can connect to the Pi in three ways: Over WiFi, USB Plug, or with the Pi disk mounted to your computer. As long as your Pi is powered on and connected to your network, it will be detected automatically based on the remote_ settings in the ini file. Bootstrap has a remote listener and will show progress so you're not left wondering if anything is happening.
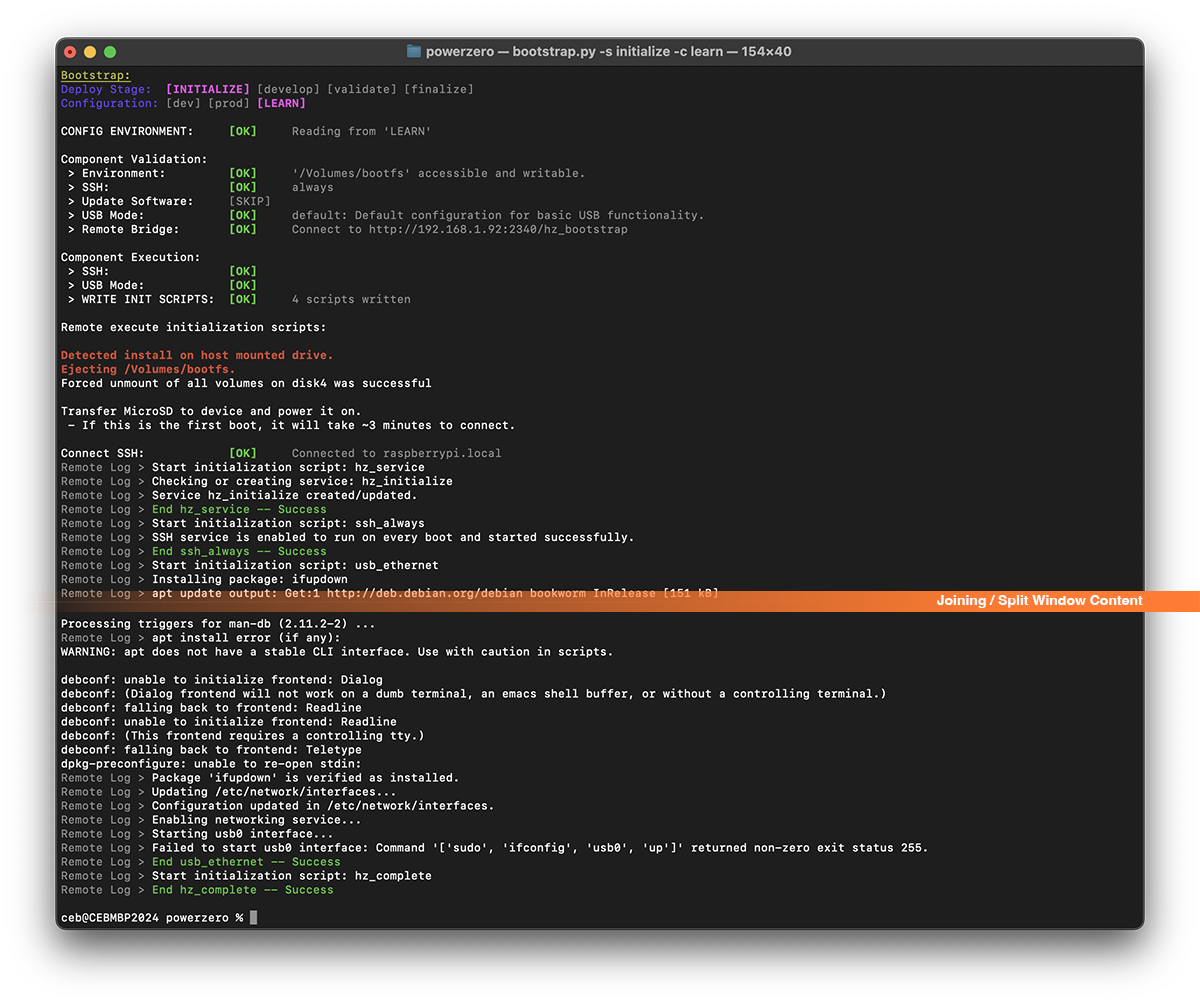
$ ./tools/bootstrap.py -s initialize -c learn
For all the learn steps in the project, we can configure them with this same command. An excerpt from the powerzero/config/bootstrap_initialize.ini is below.
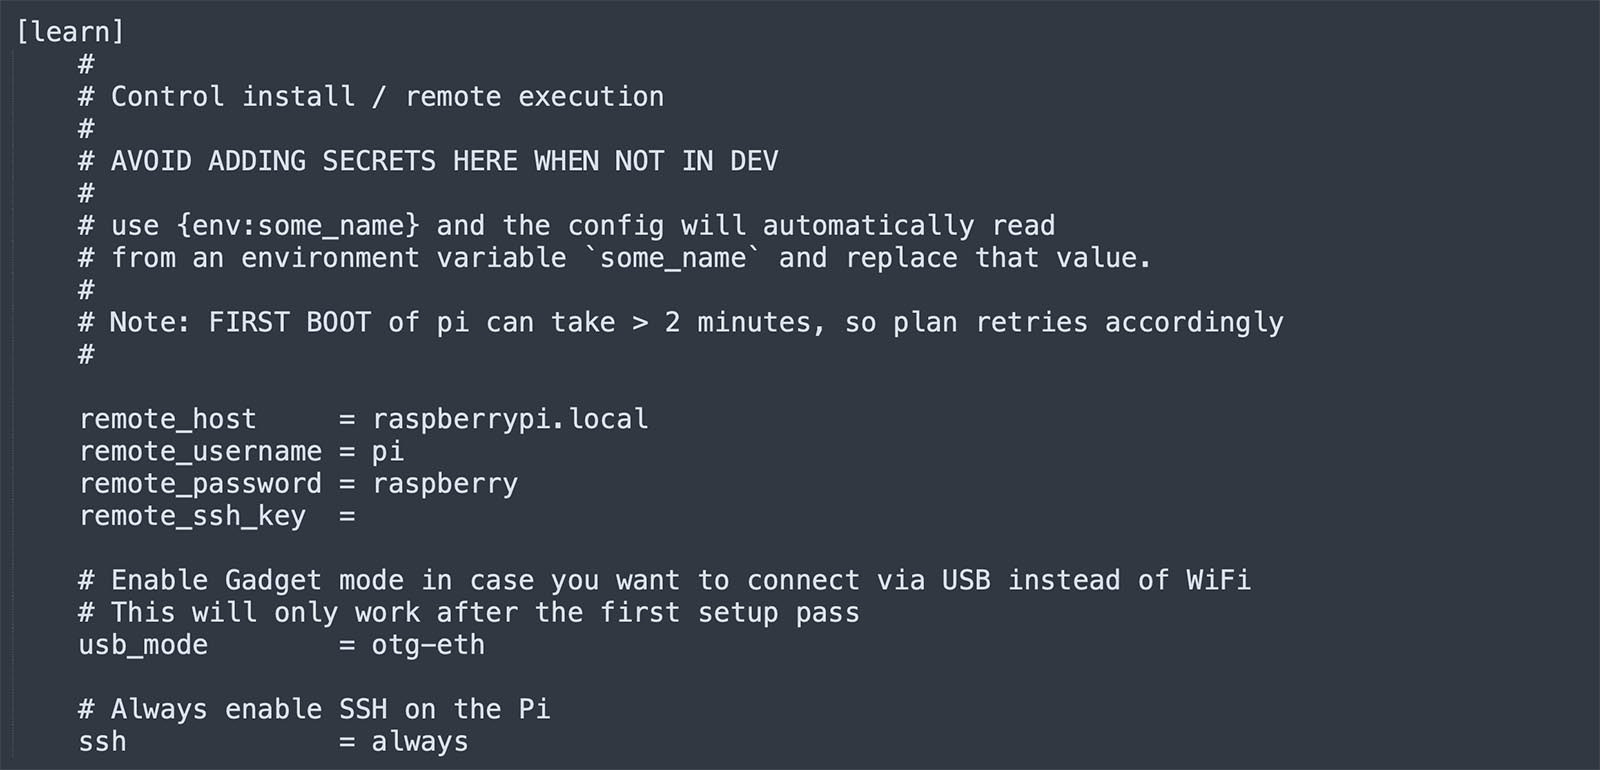
The config system initializes from the default section. Adding -c learn in the command overwrites the defaults with the settings from the learn section. Update the file if you’ve customized the username, password, or device name. If the Pi disk is mounted under a different name or uses a non-standard configuration, adjust host_volume or boot_volume as needed.
> ./tools/bootstrap.py -s initialize -c learn
4. Sync Code with tools/sync
In the same terminal window that you just did the Bootstrap step with, you can execute sync. Ensure Bootstrap has completed its process before running sync.py. (You don't need to Ctrl-C, it'll exit automatically when finished) You’ll see a notification in the terminal when Bootstrap exits the remote listener.
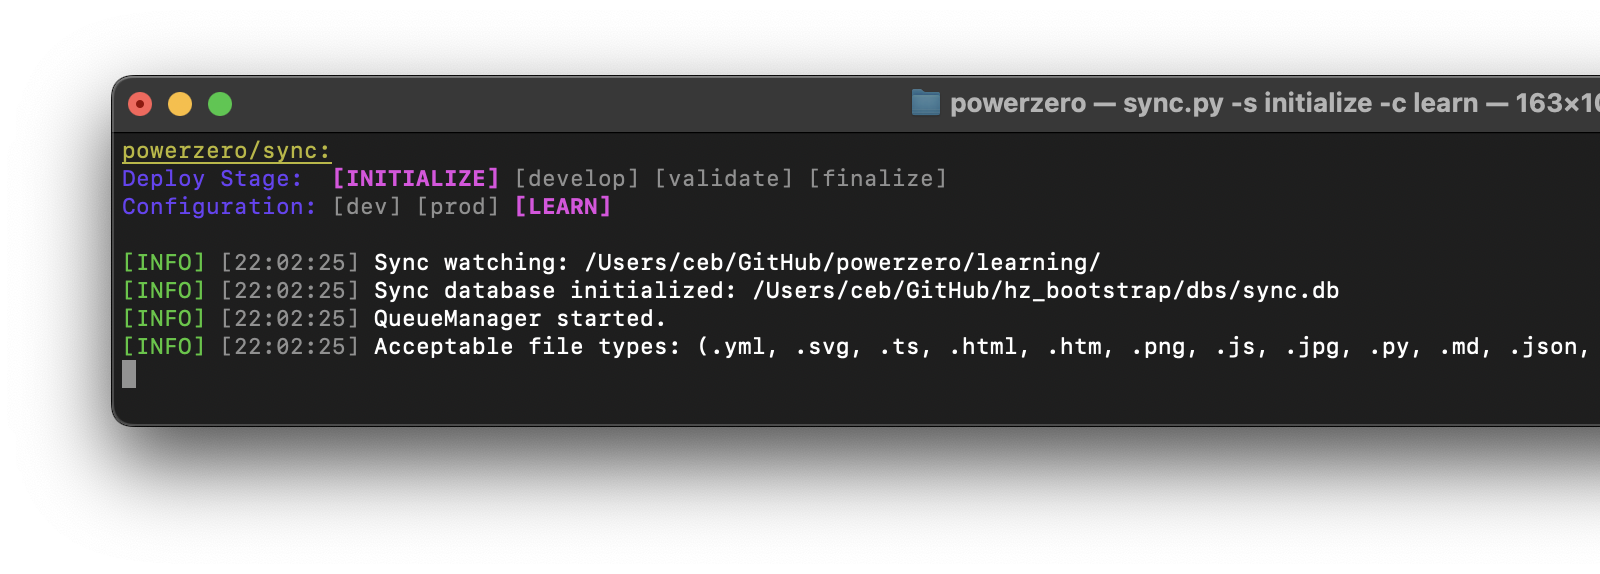
$ ./tools/sync.py -s initialize -c learn
sync.py ensures your project folder on the Pi mirrors the version on your host computer. This allows you to make changes locally and see them reflected on the Pi in real-time, enabling a seamless development experience. When you run the sync you should see something like this:
This terminal will continue to watch for file changes and show relevant synchronization details. E.g.:
> [INFO] [22:03:24] Updated: /projects/powerzero/learning/remote_coding/hello_world.py
4. SSH Into the Pi
The final step is to SSH into the Pi and execute the synchronized code. Use the following commands to navigate to your project folder and run your Python script:
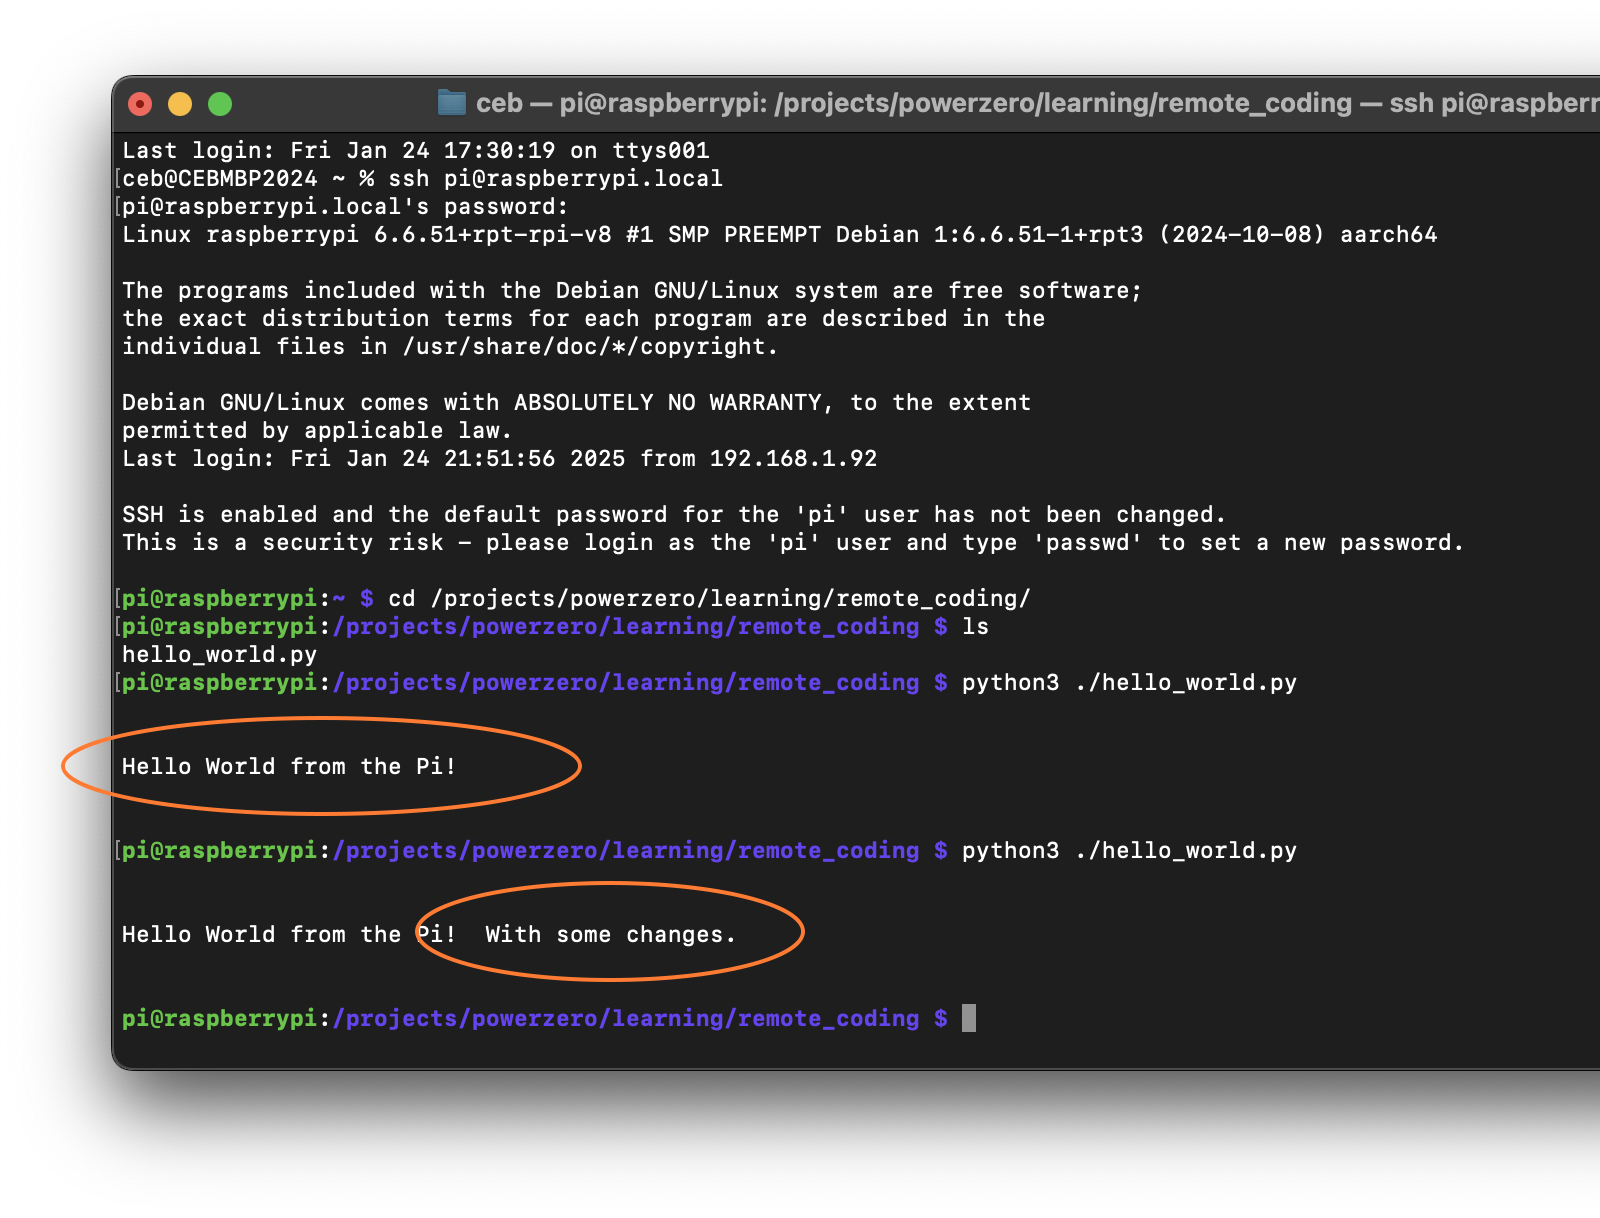
With your setup complete, the development workflow is simple: make changes to the code on your computer, let sync.py handle the updates, and execute the latest version on the Pi.
Next Steps
Key Accomplishments:
- I can configure and connect to the Pi remotely.
- I can write code on my computer, and it's automatically synchronized to the Pi; and,
- I can test the code running on the Pi.
Next Up: A Button and an LED